
BY MELISSA GLENN, CERTIFIED EDUCATOR AND READING SPECIALIST
Inside: Save time and spare yourself frustration with these excellent tips for putting up bulletin boards for classrooms! Your classroom displays will come together faster and with less stress.
This post contains affiliate links. As an Amazon Associate, I earn from qualifying purchases at no extra cost to you.
Once upon a time- I actually liked doing bulletin boards.
And those feelings lasted only until I actually had to put one together during my senior student teaching experience.
I love the idea of a gorgeous classroom display, but the actual “putting it together” part? Ugh. Not my favorite.
If you’re anything like me, you’ve probably spent more time than you’d like to admit staring at a blank bulletin board, wondering how to make it pop without eating into the little planning time we have.
An engaging and well-maintained bulletin board can spark interest and show off student work, but let’s be honest… they can also be a bit of a time sink. In the worst way. 🫠
That’s why I’m excited to share some game-changing tips and tricks I’ve gathered over the years. These aren’t just any tips – they are the ones I wish someone had told me when I first started teaching. From selecting the perfect background material that stands the test of time to creating eye-catching displays without breaking a sweat, this post is packed with practical advice to take your bulletin board game to the next level.
So, let’s get into it and change that blank space into a vibrant and efficient learning showcase. Trust me, your future self (and your weekends) will thank you for it!

Table of Contents
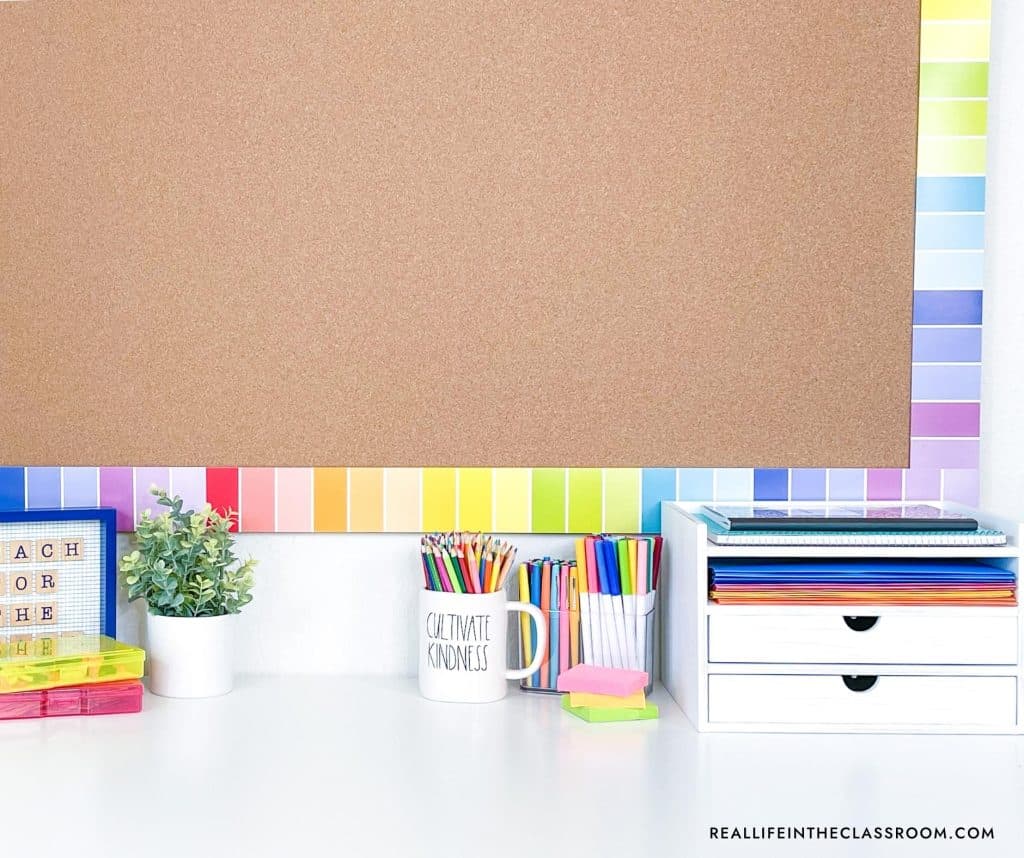
Choosing the Right Background for your Classroom Displays
When it comes to classroom displays, the background sets the stage. It’s the canvas where your creative ideas come to life. But who has the time to change it every month or season? I tried that my first year, and I’ll sum it up in one word: mistake.
Here’s a tip: choose one color of background paper to use throughout the year. Opt for a color that’s versatile enough to work with various themes – think pale yellow, serene blue, or even a classic black. This simple choice can save you from the frequent hassle of redecorating.
But if you really want to hit the easy button, consider using fabric as your bulletin board background! Fabric is a game-changer. It’s durable, fade-resistant, and gives your board a polished look. Plus, at the end of the year, you can easily take it down, fold it up, and reuse it—no more tearing or faded paper. And here’s a pro tip: if it gets wrinkled, a quick run-over with a steamer will have it looking brand new.
I also want to mention ‘Better than Paper’ bulletin board rolls. They’re thick, reusable, and don’t show staple holes – perfect for those of us who like to keep our boards fresh without constantly starting from scratch. Plus, they come in tons of colors and patterns.
These background options will help you create a lasting and adaptable foundation for all the fantastic displays you’ll make throughout the year. And they’ll save you time and frustration.
Creative and Easy Lettering Solutions for Bulletin Boards for Classrooms
Have you ever finished planning a classroom display only to get ready to put it up and realize you’ve forgotten to create title letters?
Yeah. That’s happened maybe once or twice to me—a year.
Lettering can be the bane of many a teacher’s bulletin board experience, especially if you don’t have access to a Cricut machine or an Ellison Machine.
But you do still have options.
Firstly, let’s talk about Microsoft PowerPoint. PowerPoint isn’t just for presentations; it can be very helpful for creating DIY bulletin board letters. Just resize the slide size to 8.5 by 11 or 11 by 8.5 so you can easily print your creations.
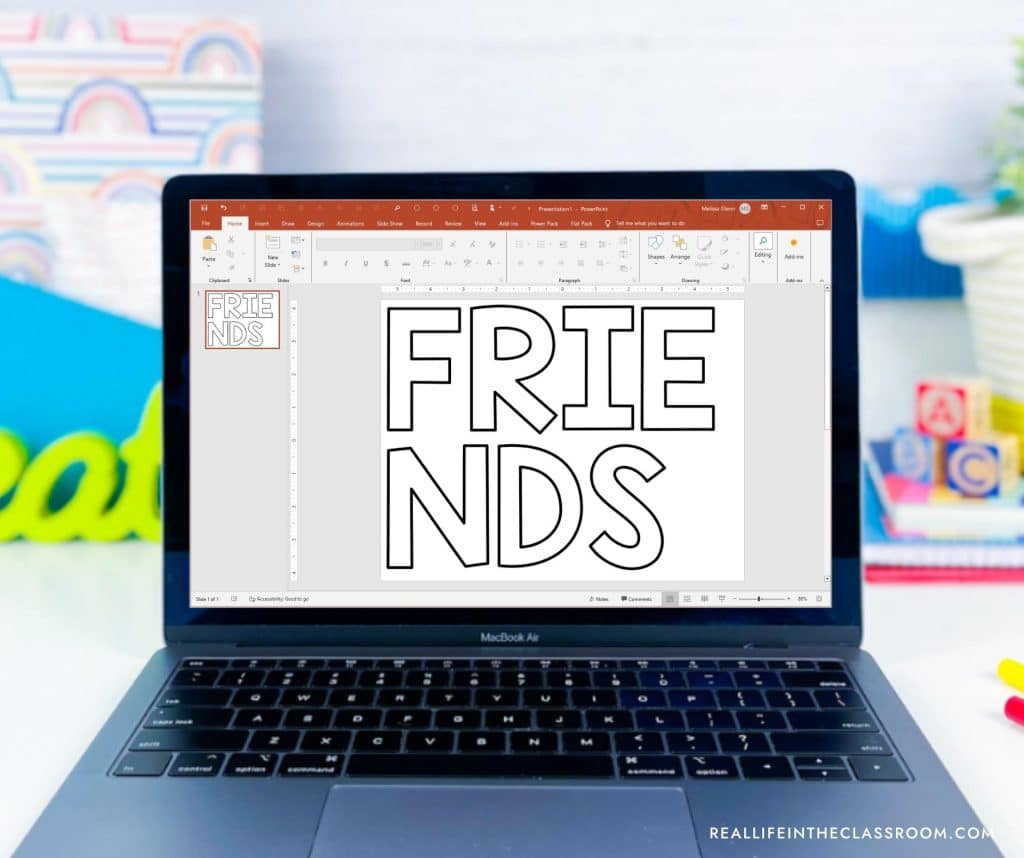
You can start by choosing a bold, readable font. There are plenty of free fonts available online – Kimberly Geswein Fonts, for instance, offers a variety of classroom-friendly options.
Type out your title and enlarge it to the desired size.
Then, you’ll want to go to Shape Format and edit the text so that the fill is white (or transparent) and the outline is black. You may also want to change the outline weight to a different thickness. (Try 6 pt and see if you like how it looks).
You can then print the letters onto any color of paper you like. Astrobrights paper really makes the letters pop!
Yes, you will have to cut these out. But do it while watching TV at night, and it’s not so terrible. Especially if you have a good pair of scissors. (These are my FAVORITE).
If you’re planning on reusing these letters (since you spent so much time cutting them out), consider printing them onto cardstock to make them sturdier or laminate them. Save them in a bag or folder labeled with the title and a photo of the finished classroom display. Keep all your bulletin board letters in a filing cabinet, organizer, or closet so you know where to find them next time!

You can have beautiful custom letters for your bulletin board. No Cricut needed.
Efficient Classroom Bulletin Board Setup Techniques
Setting up classroom displays is one of those tasks that seems so much larger than it is. I spend more time dreading it than I spend just doing it.
The truth is, it can take up a lot of your time- but it doesn’t have to be this way. Here are some techniques you can use to speed up the process!
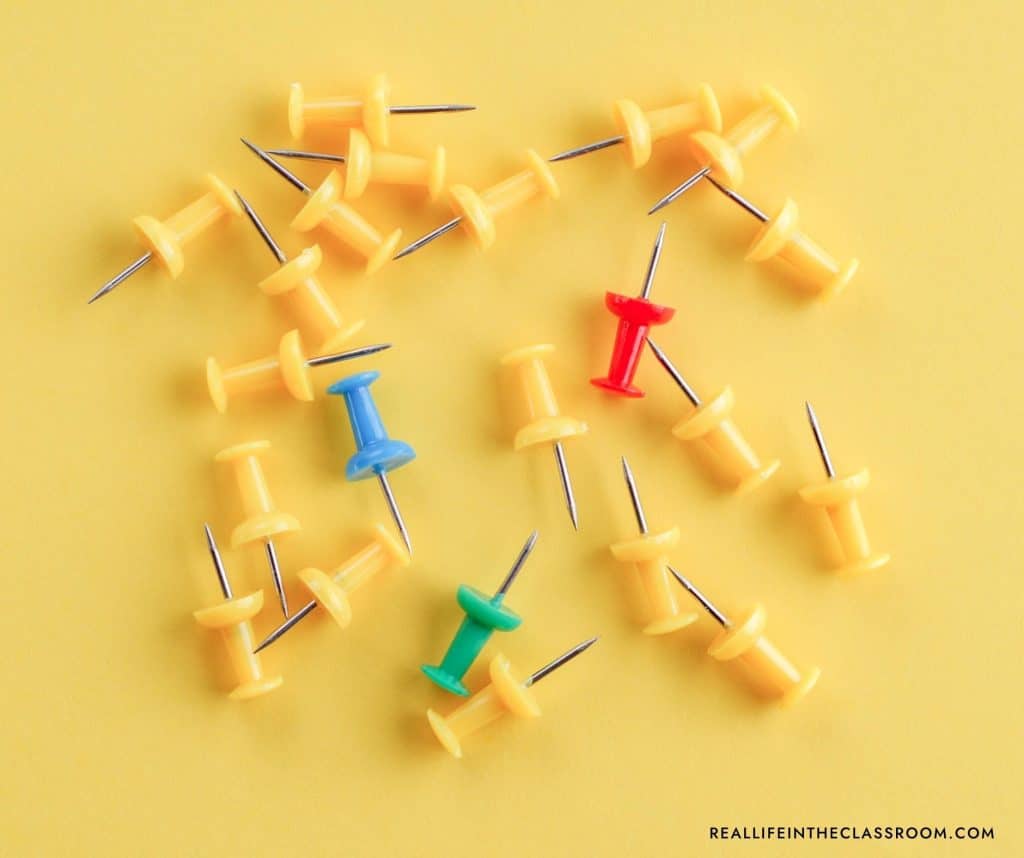
Wait on the stapler- grab the pushpins instead. Getting bulletin board paper up and onto the board quickly is a real challenge without creasing or ripping it. To save your sanity, start by using push pins. By pinning the paper to the board, you can cut the right amount of paper and then easily move the paper into the correct position without stapling a bunch of holes.
If you don’t like the way it looks, it’s easy to adjust it! When it’s ready, staple it into place.
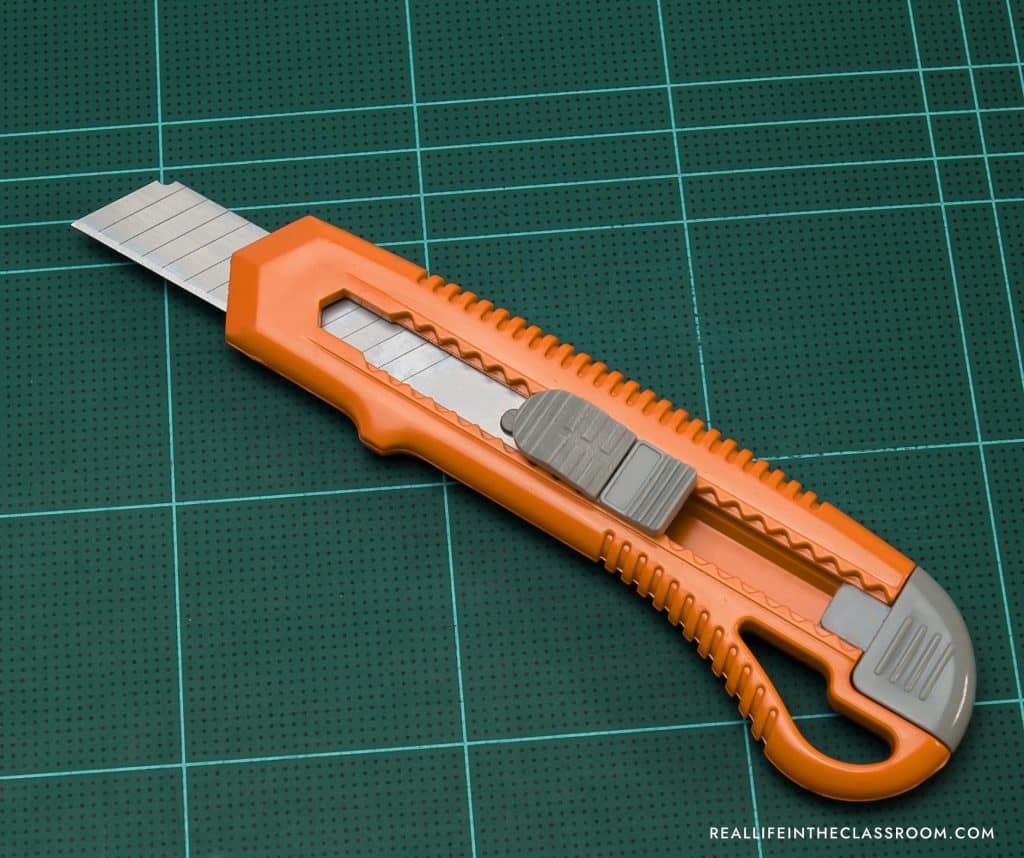
Trim excess paper with a craft knife. When hanging your bulletin board paper, leave excess around the edges. It’s much easier to trim extra paper than to fix a spot that isn’t covered enough. Then, use a craft knife to trim it. I know most teachers use scissors, but I used an X-ACTO knife my first year of teaching, and now I cannot do it any other way. Running a craft knife along the edges gives a precise cut. It’s faster than using a scissor and gives you cleaner lines.
Just be sure to store the blade somewhere safe and out of students’ reach!
Use painter’s tape to set your title up. For hassle-free letter alignment, use painter’s tape. Lay a strip of tape, sticky side up, and place your letters on it backward, in reverse order. No need to press too hard- you want to tape to stick to the letters just enough to get them into place. Then, attach the strip to the board, adjust as needed, and staple. This trick saves time and keeps your letters straight. If anything doesn’t look right, you can easily change it!

Add Visual Flair to Your Classroom Display
Making your bulletin board or classroom display eye-catching doesn’t have to be a big, elaborate project. With creativity and planning, you can add amazing visual elements- without breaking the bank.
Add Accents
Back in the day, I used to love going to teacher supply stores like Becker’s or Lakeshore and blowing my money on adorable bulletin board sets. My absolute favorites were from DJ Inkers. Do you remember those?!
I don’t buy sets often these days because I find it much easier to buy digital sets that I can print at home. Many sellers offer gorgeous bulletin board sets for classroom displays, like Pretty Meets Functional.
Alternatively, you can put your own set together by finding some clipart you love. There are so many free and inexpensive clipart sets on TPT. To get them scaled to the size you need, I recommend using MS PowerPoint. Just resize the slide size to 8.5 by 11 or 11 by 8.5. Insert the images you like, resize them, and print!
Use your printed accents to add some personality to your classroom display.
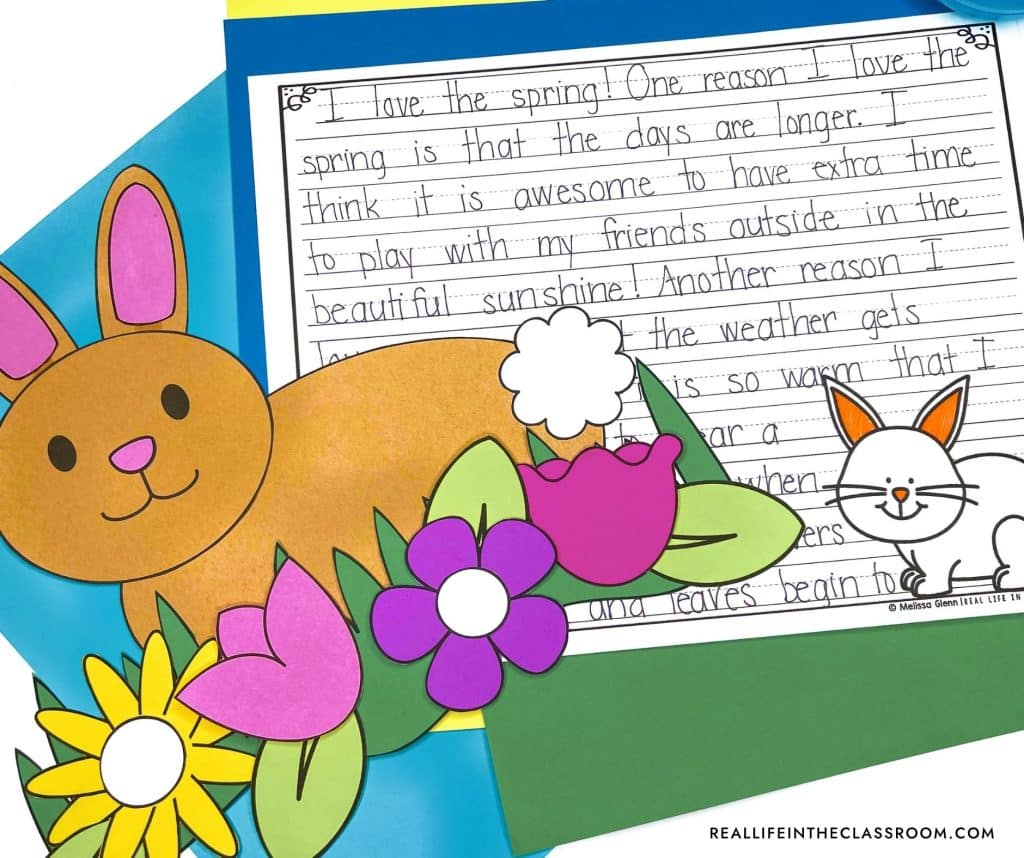
Use Student Made Crafts
Okay, so this is my favorite way to add some life to a bulletin board.
Have your students create crafts related to the theme of your display. They don’t have to be elaborate. It could be as simple as a three-piece cutout (or something more complex if you’re so inclined). I’m a big fan of making time for crafts in the classroom.
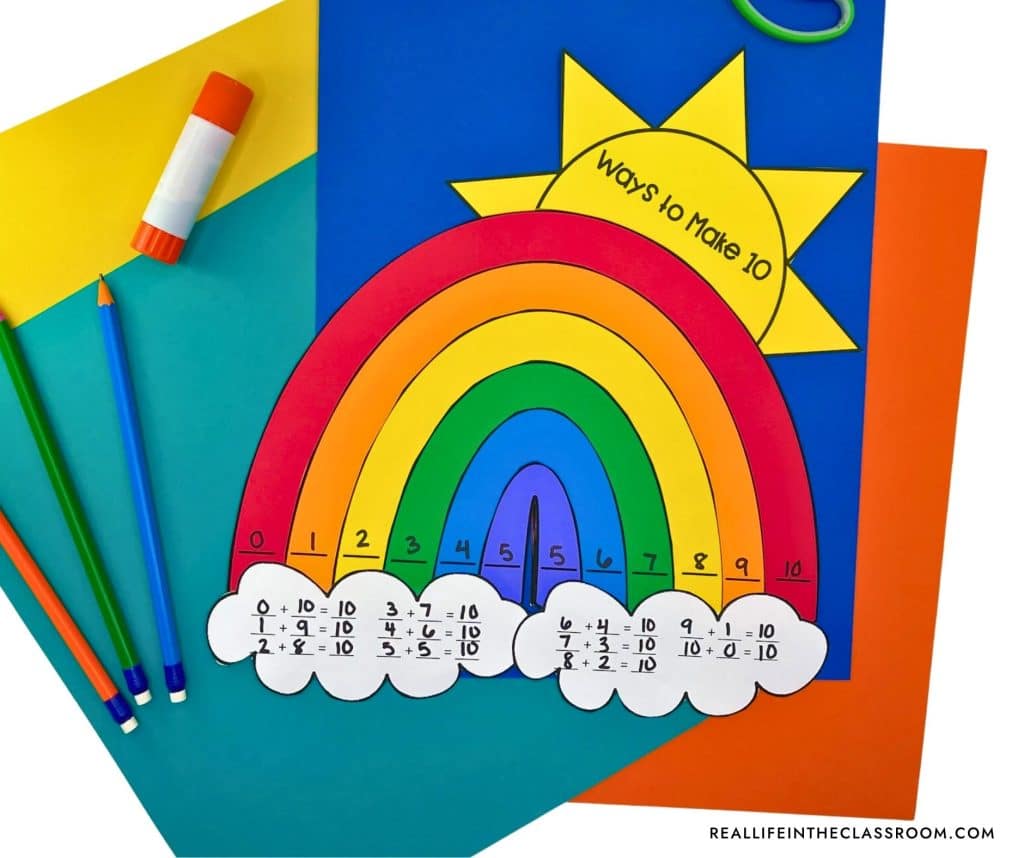
In my TPT store, Real Life in the Classroom, I offer a variety of craft activities that are perfect for classroom displays. These crafts are designed to be engaging and thematic, providing a personal touch to your display. Whether you’re celebrating a holiday or a season or want to add creative flair, you’ll find a craft that fits perfectly.
Student crafts make the bulletin board more personal, and students love displaying their work. It brings a unique touch that store-bought decorations cannot match.
Using accents- whether store-bought, printed, or student-made- you can transform your bulletin board into a visually appealing display that reflects your students’ creativity and hard work. It’s a great way to celebrate their efforts and bring fun into the classroom!
Creating Bulletin Boards for Classrooms Without Losing Your Mind
These are my tried-and-true tips for creating classroom displays that are both beautiful and practical. Hopefully, they’ll make creating classroom displays less daunting and much more fun.
By bringing your students into the creation process with crafts and interactive elements, you not only elevate the look of your boards but also instill a sense of accomplishment and community among your students. Explore my TPT store for unique craft ideas to give your bulletin boards extra sparkle.


